As we have previously seen, designing the cover is an important aspect of the book. The cover is what grabs the reader’s eye and without it, potentially no books would be read. However, once you have grabbed their attention, into the story they go. No matter how good the story is, if the typesetting is clunky, it makes the story feel clunky. If pictures are used but do not reflect the story, instead of enhancing the story it can bring the reader out and disrupt the story perhaps leading to a bad review. For this reason, typesetting is as important as the cover design.
Typesetting is done in InDesign. You have to set your document up to match the brief given. Once you have your document, you need to import your text. Before you even change font etc, you need to make sure you have no mistakes in the text. This could include double/triple spaces, hyphens or en/em dashes used incorrectly or general mistakes. Using InDesign these can be found and changed quickly through the “find” option.
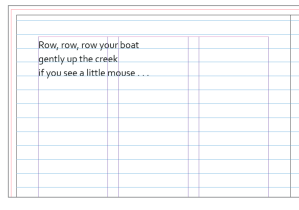 Once done, we can then set up baseline grids which are invisible lines that align our text. We can see on the picture to the left, the blue lines — similar to that of old school textbooks — are the baseline grids and our Row, row, row your boat stay to that line.
After this, you need to style your text. This is done via the Paragraph Styles and Character Styles. Paragraph Styles enable you to change the entire paragraph and character styles enable you to change odd words/characters in that paragraph. Similar to Word in that you can choose size, font-type, weight and colour it also enables you to add drop characters to every new paragraph, change leading, kerning and other things as standard.
Within InDesign you can also add things to ‘Master Pages’. This means, whatever you put here can apply to the rest of the pages. You can now add running heads and page numbers to this master page and it will add it to all of the recto or verso pages you want. Important for if you want to add chapter titles to each page of that chapter.
 make sure the brief is easy enough to understand. Somewhere where people show their illustrations is the website
  assembly in Photoshop. The publishing house will give you the dimensions needed but you must stick to them. In Photoshop, you need to include the bleed into your page dimensions so that when you put it into InDesign it fills out to the bleed line. This is so the colour is continuous to the very edge of the book cover, allowing for any extra paper the cutter might put on. Similarly, this is why we need to make sure that nothing important is near the edge of the cover as this could be cut off if the cutter is slightly off. The image shown is one for a picture book.
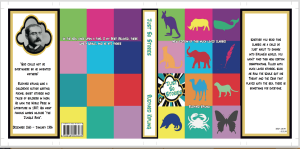 Once all this is done, then you can get to the fun part of designing the cover.
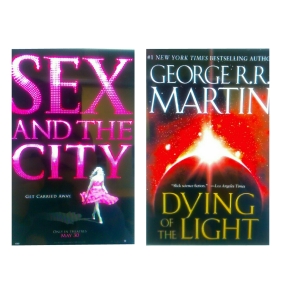 colour, size and ‘jazziness’ of the type can influence it too. The type ‘Trajan’ is used for both Game of Thrones and Sex and the City. Both totally different products and genres but due to how the type is coloured, it changes how the reader sees the type. We can see that the points, kerning and tracking are all different between the two, giving it a different feel.
 So today we were introduced to our Design and Production lecturer, Becky Chilcott. She is a freelance book designer and her most famous work includes Jacqueline Wilson and the new Harry Potter covers. Her work is scattered throughout every genre of book and every publisher. To have her as a lecturer is a great privilege and pleasure.


 Carrying on with this weeks lecture. We looked at contracts today. It made me realise that dropping Law after A level was a wise decision. Having to write these contracts seems a thankless task! However, the knowledge of what each clause means that you can properly negotiate with an author over what they want their contract to say. This is highly important as many authors will simply cross out sections they don’t like or argue over the need for certain aspects. Within the publishing world, contracts are issued for every aspect. There are Author Contracts, Editor Contract, Series editor contract, Amendment to contract, Co-publishing contract. This means that for each potential author pairing or writing team, there is a contract. This is highly important as certain breaches in contract can have severe consequences. Other, less serious breaches could just initiate a ‘get out of jail clause’ and some breaks could be easily solved and remedied. Life can get in the way of many clauses, so due date can be brushed over if the author is late, a change in length can be discussed or a change in pictures. Learning the contract your author has to sign means you can maybe see potential issues for the author ahead of time, can easily work out a happy medium or be ready on which clauses you cannot change.